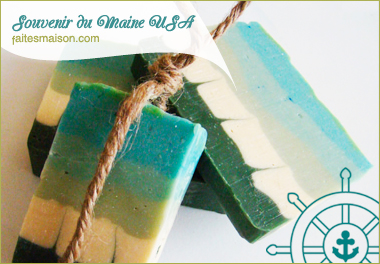
Soap Gift From Maine USA
31 August 2012 by House made
Filed under With essential oils, The flower, Novelty, Soap factory, Soaps
Here I am back from vacation… I took advantage of this and a little left side of the site. But here I am recovering from the rest and come back with a recipe that I liked to… a recipe for soap course !
A few months ago I did a soap for a great opportunity to meet with the ADNS. You can read what it is here. I wanted to make my creation on the theme holidays… I confess that I look forward to mine ! So I started thinking and I immediately thought of a trip I made small in a beautiful region of the United States. Maine ! Beautiful landscapes seaside, small white fences damaged by the wind and sand, colorful houses, blue hydrangeas, the tall grass with the big wooden walkways leading to endless beaches. Images forever etched in my head. We were in the area of Old Orchard Beach… I also remember the huge lobster that my mother's cousin had eaten. I was impressed… Odors are also engraved in my head. The smell of salt, of iode, mixed with flowers and grass… a pure delight olfactory !
So without further ado here's the recipe that I made myself inspired by this beautiful journey…
Coconut oil 25 %
Palm oil bio 25 %
Olive oil 30 %
Rapeseed oil 20 %
Water and soda to recalculate
Greasing to 7 %
The trace :
Cream
Synergy of essential oils 2,5% ( Tea tree, Lemongrass, Geranium rosa, Absolute lemon and benzoin)
Greasing to 5% for dyes
Colorants
Neon green + black coal
Titanium dioxide
Neon Blue - Titanium Dioxide
Difficulty : ![]()
![]()
![]()
![]() Conservation : Several months
Conservation : Several months
Traditional method of soap cold
Melt the oils together. Add soda water (not the other) and cool. When both mixtures, water and soda, are room temperature, pour the soda / water in your oil and mix until the appearance of the trace. Add the rest of your ingredients (essential oil, oil, oxide, mica) and pour into your molds. Wait 48 h and unmold your soaps with gloves. Place in a dry place for a minimum of cure 6 weeks.
Presentation
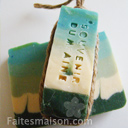
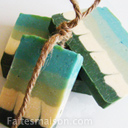
I cut each soap in two and tied a piece of string above. To give a spirit boat. All complemented by a label here as.

What technique of marbling ?
Here I used the technique to the hanger. I put about four hanger at the bottom of my mold, I cast my first two color and walked up slowly each hanger… to give the effect of the tall grass. Then I put the rest of my colorful pasta. Rien de bien compliqué 🙂
What I think
Already a few weeks ago that we use in the shower at home. I must say that I appreciate, it leaves the skin soft and very sweet. I love the smell, flowers and sweet… but hey this is very personal. I wonder what people think that I offered !
Soap tribute to Nunavut
30 March 2012 by House made
Filed under With essential oils, The flower, Novelty, Soap factory, Soaps
If you saw my post yesterday you could see all the beautiful soaps that have been created as part of an exchange between passionate soap. Today I will show you mine…
For this great swap I wanted you to travel to my home country, the Canada. A journey far North, beyond the coniferous forests,… to land ice. I was inspired, you'll understand, of glaciers in northern Canada. More exactly to the Nunavut. Nunavut with its large tracts of land, water and ice inhabited by a multitude of fabulous animals. This beautiful area is north eastern canada… and hits very close to Greenland. I am passionate about the native cultures of these regions since childhood. So I wanted, sort by soap, honor them.
Their culinary traditions and cosmetics is mostly composed of animal products. Here I tried to imagine a product 100 % plant that might suit them. Help them with their daily, the cold climate and lack of light. For indeed the seasons are marked by great period of day and night sides of… up to several months in a row.
Here is the olfactory composition of my soap. It contains grapefruit, for the sun side. Of verbena, for his part in a good mood the blues. Then the oak moss, herbaceous and woody smell this, very natural that resembles what one feels when the snow melts.
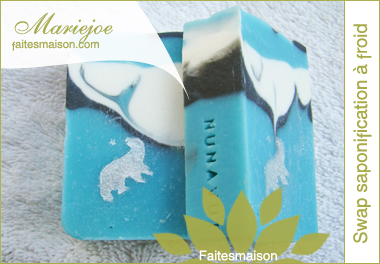
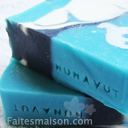
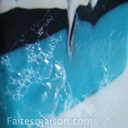
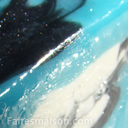
So I wanted to give the appearance of my soap glacier; these glaciers tinted turquoise depths, white and black. You might recognize as being the polar bear… emblem of Nunavut ! For the marbling technique will be explained according to the recipe.
Without further ado here is my recipe…
Coconut oil 30 %
Olive oil 21 %
Grape seed oil (macerated verveine) 28,35 %
Hazelnut oil 13 %
Huile macadamia 2 %
Beurre de karité 4 %
Huile de palme 1,65 %
Water and soda to recalculate
Greasing to 7 %
The trace :
Synergy 3 % (Grapefruit essential oil, vervain and oak moss absolute)
Neon blue dye + a hint of neon green
White titanium oxide
Black coal + Shiny charcoal gray pearl cosmetics
INS : 140,63
Difficulty : ![]()
![]()
![]()
![]() Conservation : Several months
Conservation : Several months
Traditional method of soap cold
Melt the oils together. Add soda water (not the other) and cool. When both mixtures, water and soda, are room temperature, pour the soda / water in your oil and mix until the appearance of the trace. Add the rest of your ingredients (essential oil, oil, oxide, mica) and pour into your molds. Wait 48 h and unmold your soaps with gloves. Place in a dry place for a minimum of cure 6 weeks.
Why these quantities ?
Just because I worked with what I had at home. I wanted to provide maximum softness and texture soap. Then with these curious quantities I could get a soap that my faith pleases me well. Then it stays in the theme also, because winter is done with what we had when we lived in the far north ! 🙂
Presentation
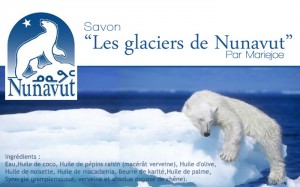
I sent these little soap about 60g in small pack of craft paper… as if it were a fragile box came directly from Canada. I have not had time to take a picture but you can see here, around here and is. I had also this label to accompany. We find the logo of the Government of Nunavut, I invite you to discover : www.gov.nu.ca
What technique of marbling ?
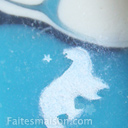
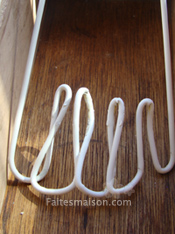
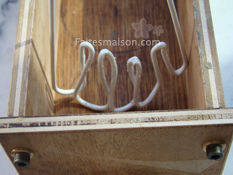
Here I used the technique to the hanger. Which involves stacking sandwich our different colors into a mold and gently move a hanger for marbling. By cons here I have not done as usual… I twisted my hanger to give it a shape of fingers and I do not go to the length but the width of my mold. As the picture. By movements up and down until the end of my mold. When cutting I added a little polar bear with his star, The logo comme de Nunavut, a small stencil that I made all applied with a little white mica.
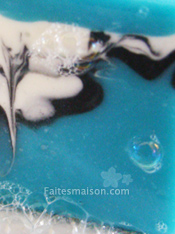
Finally, this exchange was a wonderful opportunity for me to express my respect to a little-known people. So I wanted to honor them, they who seek to preserve their languages ??and traditions, while facing the laws of species protection and environmental. This is where some traditions and environment happiness.
Let us know more precisely to protect our natural large water !
Solid strength and shine shampoo
23 January 2012 by House made
Filed under Novelty, Shampoos, Hair care
Here is my first article in 2012… I take this opportunity to wish you a happy new year ! Bien non il est pas trop tard… Today is Chinese New Year ! Et oui am… even when I take a long time to put a new article I make a good timing ^ ^.
Donc aujourd’hui je vous propose une recette pour vous fabriquer un shampoing solide. Qu’est ce que cette matière ? Tout simplement un shampoing en forme de barre de savon on va dire. Mais en mieux, il s’agit ici de plus qu’un savon. Les shampoings typique sont liquide… surfactants used therein, oui c’est ce qu’on appelle les produits qui font mousser vos shampoings. Alors qu’ici on en utilise un qui est solide. Du coup il dure 2 to 3 times longer than a normal shampoo, mousse tout autant et est le parfait allier d’un jetsetter. Ou des gens qui aiment se la rendre moins compliqué !
Ici je vous propose un shampoing pour donner de la force et de la brillance à vos cheveux. La recette est parfaite pour les débutant car facile à réaliser…
| Ingredients | % | Grams |
| Sodium Coco Sulfate (surfactant) | 80 % | 64,2 g |
| Spring Water |
10 % | 8 g |
| Huile de Cameline | 5 % | 4 g |
| Liquid silk proteins | 2 % | 1,6 g |
| Huile essentielle de Citron | 1,4 % | 1,1 g |
| Huile essentielle de Lemongrass | 1,4 % | 1,1 g |
| Vitamin E | 0,2 % | 0,2 g |

Difficulty : ![]()
![]()
![]()
![]() —– Conservation : 3 month —–Capacity : +-80 g
—– Conservation : 3 month —–Capacity : +-80 g
Method :
Spread the scs mortar or blender to break the grains slightly. Soften the water bath for several minutes usc, to a soft paste is formed, rajoutez l’eau. Lorsque l’eau est bien intégré ajoutez votre huile de cameline et mélangez doucement jusqu’à absorption. Hors du feu ajoutez vos protéines de soie et vos huiles essentielles. Vous pouvez ajouter une à deux gouttes de vitamine E pour la bonne conservation de l’huile de cameline. Versez le contenu dans un moule et placez le quelques minutes au réfrigérateur. Lorsque celui ci est bien ferme, démoulez le et laissez sécher dans un endroit sec pendant une journée entière. Le lendemain votre shampoing solide est prêt à être utilisé !
The virtues :
Huile de Cameline : Fed, soothes and protects hair roughed. Fresh green odor.
Silk protein : Conditions, sheath and relaxed hair weakened.
Lemon essential oil : Gives strength to the hair and brittle nails (brittle).
Essential oil of lemongrass : Adds shine.
Where to find ingredients ?
You will find a page on my website in the section called cosmetic “Suppliers”, you will find the addresses of all suppliers that take these ingredients.
My impressions
Cela fait déjà plusieurs semaines que j’utilise quotidiennement mon shampoing. Franchement je l’aime beaucoup. Il n’alourdi pas mes cheveux et les rends doux. Je suis très satisfaite du résultat de l’huile de cameline dans les soins capillaires, il se retrouvera parmi mes favoris c’est certains. Par contre petit conseil… add vitamin E oil to your best to keep.
Soap Citronet !
16 December 2011 by House made
Filed under With fragrances, The fruity, Novelty, Soap factory, Soaps
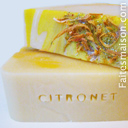
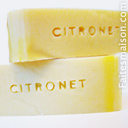
Everything is in the title… a soap that smells like lemon and clean. Here I used a fragrance as having made soaps with essential oil of lemon in the past… I know that citrus essential oils that do not always hold up well in soap. The fragrance here smells sweet lemon actually. So a little back to childhood for me ^ ^.
How does that I offer recipes for soaps ? Ben oui… the holidays arrive… so I carbureted for a month to make soaps as gifts. Du coup j’en ai beaucoup de recettes à vous montrer 🙂 Voici donc la recette de mon citronet…
Coconut oil 25 %
Beurre de Karité 15 %
Organic Palm Oil 12 %
Olive oil 30 %
Soybean Oil 18 %
Surgras to 7 %
Water and soda to recalculate
The trace :
Lemon fragrance 2 %
Decor :
Ecorse lemon
Neon yellow dye
Bright lime green
Traditional method of soap cold
Melt the oils together. Add soda water (not the other) and cool. When both mixtures, water and soda, are room temperature, pour the soda / water in your oil and mix until the appearance of the trace. Then add the rest of your ingredients (essential oil, fragrance, oil, oxide, mica) and pour into your mold. Wait 48 h and unmold your soaps with gloves, cut all. Place in a dry place for a minimum cure 4 weeks.
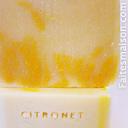
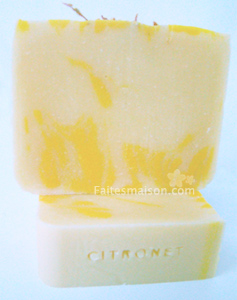 I like the color of this soap… a creamy beige with neon yellow. I applied the same method as my soap scroll, but here my mold was made of wood… I think it changes the rebound effect. It's pretty small by against yellow flames.
![]()
Here is a small label to accompany the soap.
Making a castile soap… it is easy !
22 November 2011 by House made
Filed under With essential oils, The natures, Novelty, Soap factory, Soaps
I think it should be the easiest soap making… and a softer and more ! It only takes a few ingredients because it contains a rate 100% olive oil. This is not a soap says “foaming”, but it is not so serious because now everyone knows… this is not the bubbles that wash ! Mr. soap does not foam but what it is gentle to the skin. This is also a perfect soap for toddlers. The recipe has been passed down for ages and just Castile in Spain… OLÉ ! Here's mine… finally… that I did what ! Here I make a castile soap to surgras 8 %.
Olive Hv 100 %
Water and soda to recalculate
The trace :
0.75 % essential oil of lavender (optional, do not put if it's for your children)
In Deco :
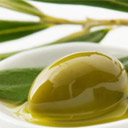
Of bay leaves, of oliviers leaves or other
Green clay
Difficulty : ![]()
![]()
![]()
![]() Conservation : Several months
Conservation : Several months
Traditional method of soap cold :
Reheat gently in olive oil. Add soda water and allow to cool. When both mixtures, water and soda, are room temperature (35 ° C.), pour the soda / water in your oil and mix until the appearance of the trace. Then add the essential oil and pour into your molds.
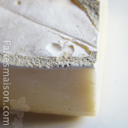
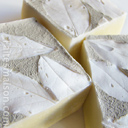
For decoration I simply asked some bay leaves on top of the dough freshly fit the mold and then sprinkled with green clay.
Wait 48 h and unmold your soaps with gloves. Remove leaves gently. Place in a dry place for a cure 4 weeks.
I finally got to use my soap and it is a wonder. It is so sweet, the smell is fresh and not heady. Pure soap and I like the cream color. Anyway, if you hesitate to start in making homemade soap, this recipe is perfect to start.
Make your bread !
19 September 2011 by House made
Filed under Cuisine, Novelty, Pains
Cela fait déjà un petit moment que je me suis mise à faire mon pain. J’ai du essayer milles et une recettes différentes. Certains pains avec de la levure sèche, in granule, bio, levain et mon bonheur se pose sur la levure fraiche. Vendu à très petit prix (20 the centimeter cube) c’est vraiment celle avec laquelle je préfère faire mon pain. Mais elle est un peu plus capricieuse et demande des petits soins.
I do not make my bread machine, je précise car les recettes si j’ai bien compris change dans ce cas. Et oui je le fait “old style”… kneaded by hand ! Rassurez-vous c’est pas plus difficile… but it is sure to hurry people… la machine est plus pratique. Il y a plusieurs étapes, but what I appreciate is that views the exposure time is long I can take care of something else, so for me it is not more restrictive.
En passant à la bibliothèque de mon quartier j’ai trouvé mon bonheur. Le livre du bonheur au pays du pain… breads of all kinds, all countries… amazing what ! Il porte très bien son nom “The big book of bread”, 130 all recipes, plenty to do ! You can find it here aussi. Mais bon allez jeter un coup d’œil à la bibliothèque ;).
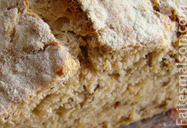
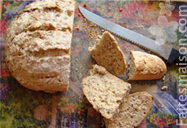
Here is the recipe that I use successfully every time :
700 g of flour T80
15 g of fresh yeast
2 cc de sel
430 ml of warm water
Optional :
Cereals, sunflower seeds, poppy seeds, thyme, garlic, etc..
Trick : Now I buy my flour in health food store in 5 kg, not only the principle but also by what I've realized that it was much cheaper than supermarket… as what the bio is not always more expensive.
Difficulty : ![]()
![]()
![]()
![]() ––Completion time + baking : 2 hours
––Completion time + baking : 2 hours
Stages :
1- So already after measuring all the ingredients I start my yeast mix gently to some of my warm water until it melts completely.
2- Then I mix very well my salt to my flour.
3- I form a well in the middle of my meal and I pour my water and my yeast mixture.
4- So here is an important step… on ne mélange pas directement le tout. Avec une main bien propre (yes I said you never know ^ ^) I'll pick up some flour gently to mix my liquid phase at the center of the well… jusqu’à obtenir une pâte liquide mais un peu collante. Saupoudrez un peu de farine sur le dessus et laisser le tout reposer comme ça pendant 15 minutes. Vous avez donc toujours votre puits.
5- After 15 minutes, time for the yeast pre ferment with flour… on mélange le tout. Pétrissez bien dans votre bol. Sortez votre pâte et continuer de pétrir sur votre plan de travail. Jusqu’à une texture élastique.
6- Put your dough in well greased bowl and cover with a damp cloth for an hour… plus si vous avez le temps. L’idéal est de la laisser dans une pièces bien chaude.
7- The finger test… enfoncez le et si la pâte ne remonte pas c’est qu’il est prêt à cuire. Enfoncez votre poing dedans la pâte et pétrissez à nouveau. Formez une boule ou une forme en long.
8- Posez votre pâte sur votre plaque de cuisson. Entaillez le dessus, to add a little olive oil, flood, poppy seeds, sesame seeds, or other.
9- Preheat oven to 220 ° C, Bake for 15 minutes. Baissez la température à 190° et continuez à cuire pendant 20 to 25 minutes. Bon j’avoue que je cuis souvent d’un coup à 200°C ^^.
So the technique of the book for a basic bread… pour moi ça fonctionne à merveille. Mais bon il faut avoir du temps. Si vous avez d’autres recettes n’hésitez pas à partager celle-ci dans les commentaires.
Good tasting !
I did my wax and I loved Eastern !
6 July 2010 by House made
Filed under Hygiene
I tried everything, the razor, his hair that grows fast and thick, depilatory creams… does not matter too much chemical, my super electric epilator which throws fresh air while épilant… big scam… I have lots of ingrown hair with this torture device ! Alors je me suis dit… well like I'll do my wax Eastern and that's it ! Le résultat ? Great !! Il enlève parfaitement la racine et si on prend la peine de faire attention à l’application aucun souci de brulure et le tout s’enlève avec une simple serviette mouillé. Franchement je suis déçue d’une seule chose… not having done it before ! Voici donc la recette que j’ai prise qui est assez traditionnel.
4 from sugar
1 part of water or orange blossom hydrosol
2 from lemon juice (well filtered)
1 part honey

Difficulty : ![]()
![]()
![]()
![]() ––Conservation : + months in a cool —Capacity : variable
––Conservation : + months in a cool —Capacity : variable
It brought back everything to the saucepan over low heat… jusqu’à l’obtention d’une couleur doré. Attention ne pas la sur-cuire, should not be your mixture is a brown color !! Lorsque c’est prêt on verse dans un pot en verre supportant la chaleur. Oui un pot bien solide car pour utilisez votre cire vous devrez la réchauffer soit au micro onde ou au bain marie.
How do I use it ?
Je me suis coupé des bandes dans un vieux jeans. J’applique un peu de cire tiède dessus et il ne me reste qu’à appliquer cette bande ciré sur l’endroit à épiler. Attention !! Always taken the band in the opposite direction of hair growth… otherwise it will not remove anything !
It's hot and you sweat… the band does not adhere ? Voici mon astuce !
Poudrez l’endroit où vous voulez vous épilez. Soit avec un peu de talc, l’argile blanche peu également faire l’affaire. Enlevez le surplus de poudre, il faut simplement absorbé l’humidité de la peau. Appliquez ensuite votre bande de cire par dessus et hop le tour est joué. J’ai appris cette astuce d’une esthéticienne il y a quelques années.
It's over ? Moisturize !
Do yourself a soft blend of sweet almond oil add a drop of essential oil to soften skin.
My spray cool below 30 ° C !
3 July 2010 by House made
Filed under Perfumed waters, Woman, Unisex
We suffer all summer… these heatstroke that does not ! Below 30 ° C in the body feels discomfort… what to do ? Drinking plenty of water and cool off as often as possible. But how good explained arrived at work all wet because of desperation we jumped in the first fountain view ! Do not panic there is a less radical solution and also nice ! Here is the recipe below and a perfect idea for the beach !
20 hydrosol ml of water or vegetable choice (apple, cassis, orange blossom, mint, raspberries, Morello, raisins, etc.)
130 ml of mineral water


Difficulty : ![]()
![]()
![]()
![]() ––Conservation : very short —Capacity : 150 ml
––Conservation : very short —Capacity : 150 ml
Mix your ingredients together and pour into a spray bottle sterile ! That's all ! Your spray is ready to go with you in your bag. For more effect to keep the refrigerator and spray you kick and neck… ice cube effect guaranteed ! Mixture of my time ? Water green apples, hydrosol of cassis and mineral water… delicious and refreshing !!
 Idea for the beach… make your mixture into a plastic spray bottle and leave in the freezer overnight. The next day put your bottle in your bag and enjoy a fresh water throughout the day !
* You will find water in apple green My Cosmetics bio.com I am completely gaga ! For a video on the benefits of water here… I already wrote my article before the show… but it did confirm that !
Soin douceur contour de l'oeil
15 June 2010 by House made
Filed under Cream, Novelty
You never think enough for us… les miens sont très sensible et ont tendance à faire des petites rougeurs lors de moment de stress. Du coup qui dit contour de l’œil sec dit bonjour aux rides. J’ai donc voulue chouchouter cette partie de mon visage que j’ai trop souvent tendance à négliger. Voici donc une petite recette qui me fait le plus grand bien depuis déjà quelques semaines.
6 g avocado oil (softener and protector)
6 g rice bran oil (decongestant)
2 g beurre de karité (feeding)
3.2 g olivem 1000 (emulsifier)
15 g cornflower hydrosol (soothing)
10 g pure water (with a pH adjusted)
3 vitamin E drops (antioxidant)
1% aromatic extract of your choice (Here I put chestnuts)
2 % Coenzyme Q10 (antioxidant, protective, repairer… Brief awesome ^ ^)
0.6 % Ecogard (conservative)


Difficulty : ![]()
![]()
![]()
![]() ––Conservation : 1 month —–Capacity : 40 g
––Conservation : 1 month —–Capacity : 40 g
Au Bain Marie, Melt the Olivem 1000 with your oils, la vitamine E et votre beurre de karité. Dans un autre récipient faites réchauffer votre hydrolat et eau ensemble. Lorsque votre cire/huiles/beurre est bien fondu et les deux phases sont environ à la même température (about 70 ° C.), mélangez les deux phases ensemble en fouettant énergiquement. N’hésitez pas à utiliser un fouet électrique. Laissez le mélange refroidir un peu et ajouter votre coenzyme Q10, votre extrait aromatique et pour finir votre conservateur. A transférer dans un flacon ou un tube toujours stérile. Pour plus d’effet gardez le au réfrigérateur cela vous procurera un petit effet tenseur.
Here is a small label to decorate your bottle gently !

A perfume gel, rose & vanilla !
10 March 2010 by House made
Filed under Woman
Here's a little fun and easy to create perfume. Your friends will be impressed with its use and most importantly it is free !
8 ml of rose hydrosol
8 ml pure water
1 tip of xanthan gum
few drops of vanilla fragrance
1 tip of pink mica
0.6% drops ECOGARD

Difficulty : ![]()
![]()
![]()
![]() ––Conservation : 3 month —–Capacity : 16 ml
––Conservation : 3 month —–Capacity : 16 ml
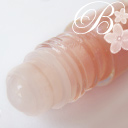
Mix the hydrosol, water and xanthan gum until a gel based. Add the rest of your ingredients and pour the contents into a ball bottle (de style roll-on).
Roll the ball on your wrists, your neck. A real delight and especially of great sweetness. This is not a fragrance that takes the head remains delicate and sweet.
Feel free to change the flavor, another hydrosol, aromas, essential oils (used to dilute the Solubol), other fragrance, let go by your own inspiration !
Here is a small label to decorate your bottle !
