Déodorant crème infaillible
7 May 2015 by House made
Filed under Feminine deodorants, Male deodorants, Unisex deodorants, Novelty
Il y a quelques années, en 2009 pour être plus précise, je m’essayais à la création de déodorant crème (Déo crème de la crème). Une vraie révolution pour moi ! Bon… le mot peu sembler un peu fort pour si peu… mais arriver à se faire un produit maison si efficace était une vraie bénédiction. Hélas à l’époque, il finissait par m’irriter un peu car je ne connaissais pas ce que je connais aujourd’hui concernant le bicarbonate de soude*… ne vous en faites pas je vous expliquerais plus tard.
Alors comment… mais qu’est ce… que ce déo crème ? Tout simplement un savant mélange d’ingrédients des plus simples que l’on utilise avec les doigts. What ?!? Avec les doigts ?!? Si si, je vous assure, rien de bien méchant 😉 Le prix de fabrication est vraiment minime en plus ; bien sur on en trouve aussi du tout prêt dans le commerce, si la confection maison n’est pas votre tasse de thé (même si le prix triple voir plus, par rapport à la confection maison). Je vous donnerais quelques pistes pour cela en fin d’article.
Sans plus attendre, voici la recette :
25 g d’huile de noix de coco (une huile solide à température froide)
13 g sodium bicarbonate (prendre une ultra fine*)
12 g fleur de maïs (maïzena) ou arrow root
2 g cire d’abeilles
2 g cire florale (ici j’ai pris à l’orange)
3% d’huile essentielles au choix ; ici j’ai choisi :
8 gouttes he citron (Purifying)
8 gouttes he tea tree (antibacterial)
8 gouttes he palmarosa (astringent)
8 gouttes he ciste (tensor)
Difficulty : ![]()
![]()
![]()
![]() ––Conservation : longue —–Capacity : +- 55g
––Conservation : longue —–Capacity : +- 55g
Faites fondre votre huile et les cires (d’ailleurs vous pouvez utiliser que de la cire d’abeille, 4g dans ce cas). Quand tout est bien fondu, incorporez votre bicarbonate de soude et votre fleur de maïs. Mélangez doucement. Lorsque le mélange est un peu moins brulant mais toujours assez liquide, ajoutez vos huiles essentielles. Versez le tout dans un pot stérile. Je vous conseille de continuer à mélanger jusqu’à ce que le mélange soit plus solide ; le but est qu’on ne se retrouve pas avec toute la phase sèche au fond du pot.
Ici j’ajoute de la cire, surtout pour empêcher que le produit devienne liquide pendant l’été, car bien que l’huile de noix de coco soit solide, il devient bel et bien liquide à température avoisinant les 21°C. More, j’aime beaucoup la texture que me donne la cire florale ici… la mienne étant assez souple.
On applique ce mélange du bout des doigts sous les aisselles propres et sèches. Je vous assure que le résultat est fabuleux ! On transpire quand même bien sur (ce n’est pas un anti-transpirant), mais on sent bon toute la journée. C’est impressionnant !
* Attention je précise “ultra fine” car si vous prenez le bicarbonate typique du supermarché, il risque de vous irriter ; il faut un grade fin. Comment savoir ? En le choisissant en magasin bio et sur des sites de revente de produits cosmétiques, comme Aromazone par exemple. Vraiment, j’insiste car cela fait une énorme différence. Vous pouvez essayer de mixer votre bicarbonate… mais je ne sais pas si cela sera concluant. **Après un commentaire de Christine qui fait cette recette que je lui avait transmise l’année dernière elle confirme que de mixer un bicarbonate de soude plus gros au mixeur l’affine très bien ! Merci pour cette info 🙂 **
J’espère que ce premier article après un long… très long moment d’absence vous a plu ! Je pense revenir avec quelques autres idées et recettes dans un futur proche… et bien sur, le site aura bientôt un petit relooking 😉
Si vous préférez les déodorants tout faits :
Il y a la marque Soapwalla qui en fait deux sortes, et aussi trois sortes chez Au coeur des racines dont j’ai entendu beaucoup de bien.
Tips to keep your teeth white !
30 November 2012 by House made
Filed under Mouth, Cleaning, Tips & Tricks
It's been a while since I have not fulfilled my tips section… aujourd’hui je vous en présente une bien pratique ! Who does not want a beautiful smile white and bright ! Known toothpastes “Whitening” that are effective but detrimental to long-term. Les traitements blanchissant à faire à la maison… to banish while there ! Why ? Simply because it removes a very small layer of your enamel every time and that is under your enamel ? La dentine… that it is yellow, alors vous imaginez votre sourire après trop d’utilisation de produits abrasifs ? Jaune de chez jaune ! Pas terrible hein !
Voici quelques astuces pour garder un joli sourire blanc.
De temps en temps, vous pouvez vous faire un brossage avec le jus d’un demi citron et de bicarbonate de soude.
Ou vous pouvez aussi écraser une fraise, en saison bien sur, et du bicarbonate de soude et vous brosser les dents avec ce mélange. J’en avais déjà parlez ici il y a quatre ans.
Cela blanchi légèrement les dents en enlevant les taches. C’est une façon naturelle de palier à ce problème.
Par contre à faire une à deux fois par mois maximum.
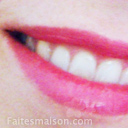

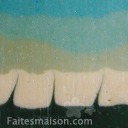
J’ai personnellement fait les deux méthodes et j’ai été plus que surprise du résultat. Je ne fais pas cela toute les semaines, mais de temps en temps quand je vois que mes dents ne sont pas aussi blanche. Une a deux fois par mois on va dire. Mon dentiste m’a dit que la teinte était très bien, voir la photo, donc je pense que je dois bien faire les choses.
De plus je ne suis pas du tout adepte des produits blanchissant, peut être que cela vient du fait qu’il y a de nombreux dentistes dans la famille (3 générations). Toujours est-il que le meilleur moyen de garder ses dents blanche est d’avoir une alimentation saine et de respecter certaines règles.
1. Pas de cigarettes ! Mais oui tout le monde sait que ça jaunis les dents… et pas que. Vous ferez en plus de sacré économies.
2. Le café ! Oui le café bien que pour beaucoup il est essentiel le matin, voir tout au long de la journée… il a le vilain défaut de jaunir nos dents. Vous n’avez qu’à regarder vos belle tasses blanche ! Boire un grand verre d’eau après votre tasse/bol de café .
3. Le thé ! Mais oui le thé aussi attaque la couleur des dents ! Même chose un grand verre d’eau.
4. Le curry. C’est bon mais ça tache, de l’eau et un bon brossage après vous aidera.
5. Mesdames… les rouges à lèvres de ton chaud, bien que très joli accentue le jaune des dents. Préférez les teintes froide pour donner un effet de blancheur à vos dents.
6. Le fil dentaire ou les brossettes interdentaire ! Mais oui ça parait banal mais c’est aussi une façon de garder vos dents blanche et propre.
7. Une goutte d’huile essentielle de citron sur votre dentifrice lors du brossage. (pas mal mais pas extraordinaire comme résultat)
Une autre chose. Il n’y a pas un blanc “universel”, chaque personne a un émail de couleur différent. Ne vous fiez donc pas à la couleur des dents de votre ami, voisin ou autre. L’important est d’entretenir vos dents sainement et d’avoir une couleur uniforme selon la teinte de votre émail d’origine.
J’espère que ces astuces vous seront utile… bien que pas véritablement révolutionnaire. Mais je pense que faire ces petits astuces vous éviteront des frais inutiles.
Ne pas oublier, la prévention est toujours la meilleur des solutions. Si vous entretenez bien vos dents, elles resteront belle, saine et blanche !
Et si vous tenez à faire des traitements blanchissant, voyez avec votre dentiste c’est le seul en mesure de vous donnez des conseils avisé. Oubliez les centre de blanchissement ou les bar à sourire (centre juste pour le blanchiment des dents) ce sont pour beaucoup des arnaques… les seuls à véritablement sourire après avoir votre argent. Les agents blanchissant sont très puissant et comme j’en ai parlé plus haut, chacun à une dentition qui lui ai propre. Donc… visitez votre DENTISTE !!
J’ai une copine blogueuse Réo, qui a aussi fait un article sur le sujet… c’est ici si vous voulez voir !
A bientôt et… souriez 🙂
Make his daily cleanser for brushes
28 November 2012 by House made
Filed under Makeup, Cleaners, Novelty
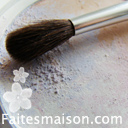
Makeup brushes, absolutely must be cleaned regularly, beaucoup de problèmes de peaux viennent d’un mauvais nettoyage et de produits contaminé. Mais le lavage à l’eau tiède et savon devient long au quotidien. C’est pourquoi il existe sur le marché des solutions liquide nettoyante et désinfectante qui sèche rapidement. Quenched brush or spray says, towels and presto everything is clean ! By cons these products are sold quite expensive perfume. C’est suite à une discussion entre copines je me suis dit… ben is why not make myself.
Je suis donc partie à la recherche sur internet. Il existe beaucoup de recettes et de tuto pour faire son nettoyant maison. Mais tous avec des ingrédients spécifiques et qui demande à ce qu’on achète un shampoing bébé, a conditioner, de l’alcool etc etc. Comme j’ai pas ces choses, hey no I do not have children, je me suis dit que je scruterais bien la recette d’un des fameux nettoyant vendu en parfumerie et l’adapté au produits que j’ai chez moi. C’est là qu’une copine, I ma belle (check out his blog misscalea) m’a fait voir la liste d’un qu’elle avait acheté et là on en est venu à se dire que ce n’était vraiment pas sorcier. De l’eau, alcohol, un tensio actif et un conservateur. Vraiment ? So simple ? Ben oui ! Je me suis donc lancé ! J’ai fabriqué, I cleaned and then… frankly it's not bad at all !
Here is my recipe that I said it was done in no time, je vous redonnerais mes impressions dans quelques temps. Je l’utilise sur des pinceaux en poils synthétique. Il faut faire attention à l’usage excessif de produits contenant de l’alcool pour ne pas altérer la texture des pinceaux notamment ceux en poils naturels. Surtout ne pas mettre trop d’alcool qui peut aussi décoller les poils au manche. Donc de l’alcool oui mais pas trop ! Here is my recipe…
78,32 % demineralized water
19,58 % alcohol 70 ° (modified works very well)
1,5 % active tension smooth coconut (another little do the trick as)
0,6 % Cosgard
Difficulty : ![]()
![]()
![]()
![]() ––Conservation : – —–Capacity : –
––Conservation : – —–Capacity : –
Method :
Mix all ingredients together, without too agitated to cause foaming and pour into a spray bottle well sterile.
Use :
Spray on your brushes, not too close to the place where they are glue together, et frotter sur un morceau de sopalin ou un chiffon propre. Recommencez jusqu’à ce que plus rien ne transfert. Laissez sécher la tête en bas ou posé sur un chiffon propre.
Verdict :
I'm very satisfied, mes pinceaux sont resté doux et propre. Je n’ai pas utilisé de fragrances, or essential oils to prevent allergic reactions, because many of the brushes on the eyes will also ! Je verrais au fur et a mesure de l’utilisation ce que j’en pense mais à date j’en suis vraiment contente.
Products also disinfect !
It is not enough to clean his brushes… il faut aussi de temps en temps nettoyer la surface de nos produits. Comme les fards par exemple, passez un petit chiffon sur leur surface et vaporiser de l’alcool à 70° et laissez sécher. Cela n’altère aucunement vos produits ! Vous éviterez bien des désagréments, because a lot of affection skins come from misuse of these tools.
Attention !
This product does not replace a thorough cleaning should be done regularly !!
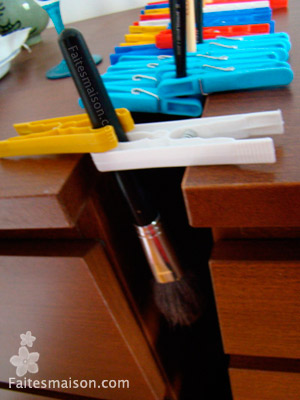
***Tip ***
To dry your brushes, whatsoever with the cleaning or the fact that soap and water… voici une idée pour sécher vos pinceaux tête en bas. Pourquoi tête en bas… so that the water does not flow into the brush handle because there can form mold (yes yuck) ! Il vous suffit de quelques pinces à linge et d’un espace entre deux meubles. Je fais souvent ceci sur mon étendoir à linge… it is well !
Other recipes :
I have a girlfriend of the web has also made a perfect recipe, with different ingredients of mine I invite you to visit his formulation here at the lair of the Goblin.
See you soon for other recipes !
Soap Gift From Maine USA
31 August 2012 by House made
Filed under With essential oils, The flower, Novelty, Soap factory, Soaps
Here I am back from vacation… I took advantage of this and a little left side of the site. But here I am recovering from the rest and come back with a recipe that I liked to… a recipe for soap course !
A few months ago I did a soap for a great opportunity to meet with the ADNS. You can read what it is here. I wanted to make my creation on the theme holidays… I confess that I look forward to mine ! So I started thinking and I immediately thought of a trip I made small in a beautiful region of the United States. Maine ! Beautiful landscapes seaside, small white fences damaged by the wind and sand, colorful houses, blue hydrangeas, the tall grass with the big wooden walkways leading to endless beaches. Images forever etched in my head. We were in the area of Old Orchard Beach… I also remember the huge lobster that my mother's cousin had eaten. I was impressed… Odors are also engraved in my head. The smell of salt, of iode, mixed with flowers and grass… a pure delight olfactory !
So without further ado here's the recipe that I made myself inspired by this beautiful journey…
Coconut oil 25 %
Palm oil bio 25 %
Olive oil 30 %
Rapeseed oil 20 %
Water and soda to recalculate
Greasing to 7 %
The trace :
Cream
Synergy of essential oils 2,5% ( Tea tree, Lemongrass, Geranium rosa, Absolute lemon and benzoin)
Greasing to 5% for dyes
Colorants
Neon green + black coal
Titanium dioxide
Neon Blue - Titanium Dioxide
Difficulty : ![]()
![]()
![]()
![]() Conservation : Several months
Conservation : Several months
Traditional method of soap cold
Melt the oils together. Add soda water (not the other) and cool. When both mixtures, water and soda, are room temperature, pour the soda / water in your oil and mix until the appearance of the trace. Add the rest of your ingredients (essential oil, oil, oxide, mica) and pour into your molds. Wait 48 h and unmold your soaps with gloves. Place in a dry place for a minimum of cure 6 weeks.
Presentation
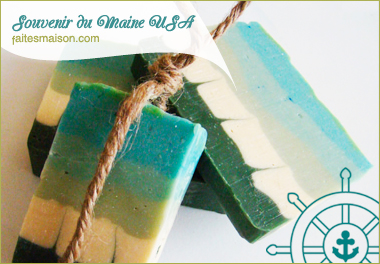
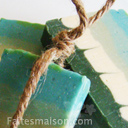
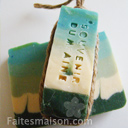
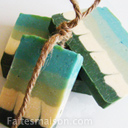
I cut each soap in two and tied a piece of string above. To give a spirit boat. All complemented by a label here as.

What technique of marbling ?
Here I used the technique to the hanger. I put about four hanger at the bottom of my mold, I cast my first two color and walked up slowly each hanger… to give the effect of the tall grass. Then I put the rest of my colorful pasta. Rien de bien compliqué 🙂
What I think
Already a few weeks ago that we use in the shower at home. I must say that I appreciate, it leaves the skin soft and very sweet. I love the smell, flowers and sweet… but hey this is very personal. I wonder what people think that I offered !
Gel capillary loops minutes sublimated
20 June 2012 by House made
Filed under Novelty, Hair care, Care Styling, Tips & Tricks
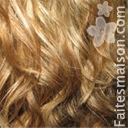
For years I use aloe gel as a natural hair gel. Yes yes the gel pure and simple fuss-free. J’en ai fait aussi quelques recette avec un peu plus d’ingrédients comme here and is. Mais aujourd’hui je vous fait la recette minute que j’utilise régulièrement pour que mes boucles reste belles et légères. C’est très facile et vous n’aurez ni besoin de conservateur, or containing, or complicated process. All manufacturing is minute and immediate application !
1 tablespoon aloe gel
1 to 2 drops of provitamin B5
1 to 2 drops liquid extract silk
Difficulty : ![]()
![]()
![]()
![]() ––Conservation : – —–Capacity : –
––Conservation : – —–Capacity : –
Method :
Mélangez le tout dans le creux de vos mains et appliquez sur toute la chevelure mouillé. Laissez bien séché à l’air. My recipe is perfect for my hair length, half long and I have lots of volume. Mais attention, commencez par de petites quantités afin de ne pas alourdi vos cheveux ou trop les imbiber… sinon effet carton!
Tadam !!!! That's it ! Not very complicated is not it ? Bien oui pourquoi se compliqué la vie quand on peut faire bien, Cheap and fast !
Ingredients :
D'Vera Gel Aloès : Moisturizing and nourishing. Definitely a must, the skin has a unique healing action.
Provitamin B5 : Strengthening, repair and shines.
Silk protein liquid : Maintains hydration, lisse les écailles (++ for curly hair) and generally beautify the hair.
Other possibilities :
Rice protein : Gives volume and maintains the hydration of the hair.
Vegetable oil : Nourishes hair, whether monoi, coco, macadamia, Argan or other. Vegetable oils are superb ally for beautiful hair.
Where
Where to find ingredients ? In food store or online… go take a look in the section supplier.
Stay tuned for more recipes minutes….
Soap tribute to Nunavut
30 March 2012 by House made
Filed under With essential oils, The flower, Novelty, Soap factory, Soaps
If you saw my post yesterday you could see all the beautiful soaps that have been created as part of an exchange between passionate soap. Today I will show you mine…
For this great swap I wanted you to travel to my home country, the Canada. A journey far North, beyond the coniferous forests,… to land ice. I was inspired, you'll understand, of glaciers in northern Canada. More exactly to the Nunavut. Nunavut with its large tracts of land, water and ice inhabited by a multitude of fabulous animals. This beautiful area is north eastern canada… and hits very close to Greenland. I am passionate about the native cultures of these regions since childhood. So I wanted, sort by soap, honor them.
Their culinary traditions and cosmetics is mostly composed of animal products. Here I tried to imagine a product 100 % plant that might suit them. Help them with their daily, the cold climate and lack of light. For indeed the seasons are marked by great period of day and night sides of… up to several months in a row.
Here is the olfactory composition of my soap. It contains grapefruit, for the sun side. Of verbena, for his part in a good mood the blues. Then the oak moss, herbaceous and woody smell this, very natural that resembles what one feels when the snow melts.
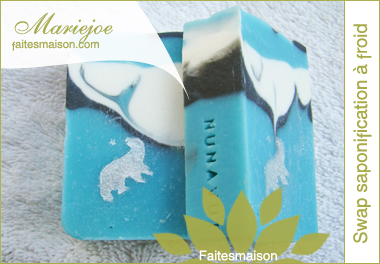
So I wanted to give the appearance of my soap glacier; these glaciers tinted turquoise depths, white and black. You might recognize as being the polar bear… emblem of Nunavut ! For the marbling technique will be explained according to the recipe.
Without further ado here is my recipe…
Coconut oil 30 %
Olive oil 21 %
Grape seed oil (macerated verveine) 28,35 %
Hazelnut oil 13 %
Huile macadamia 2 %
Beurre de karité 4 %
Huile de palme 1,65 %
Water and soda to recalculate
Greasing to 7 %
The trace :
Synergy 3 % (Grapefruit essential oil, vervain and oak moss absolute)
Neon blue dye + a hint of neon green
White titanium oxide
Black coal + Shiny charcoal gray pearl cosmetics
INS : 140,63
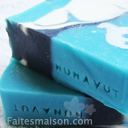
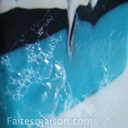
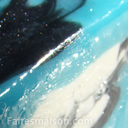
Difficulty : ![]()
![]()
![]()
![]() Conservation : Several months
Conservation : Several months
Traditional method of soap cold
Melt the oils together. Add soda water (not the other) and cool. When both mixtures, water and soda, are room temperature, pour the soda / water in your oil and mix until the appearance of the trace. Add the rest of your ingredients (essential oil, oil, oxide, mica) and pour into your molds. Wait 48 h and unmold your soaps with gloves. Place in a dry place for a minimum of cure 6 weeks.
Why these quantities ?
Just because I worked with what I had at home. I wanted to provide maximum softness and texture soap. Then with these curious quantities I could get a soap that my faith pleases me well. Then it stays in the theme also, because winter is done with what we had when we lived in the far north ! 🙂
Presentation
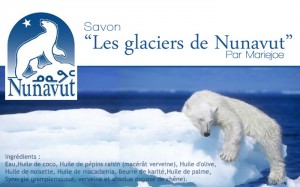
I sent these little soap about 60g in small pack of craft paper… as if it were a fragile box came directly from Canada. I have not had time to take a picture but you can see here, around here and is. I had also this label to accompany. We find the logo of the Government of Nunavut, I invite you to discover : www.gov.nu.ca
What technique of marbling ?
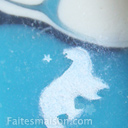
Here I used the technique to the hanger. Which involves stacking sandwich our different colors into a mold and gently move a hanger for marbling. By cons here I have not done as usual… I twisted my hanger to give it a shape of fingers and I do not go to the length but the width of my mold. As the picture. By movements up and down until the end of my mold. When cutting I added a little polar bear with his star, The logo comme de Nunavut, a small stencil that I made all applied with a little white mica.
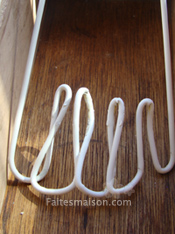
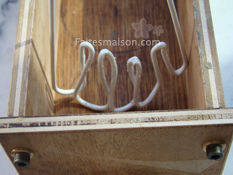
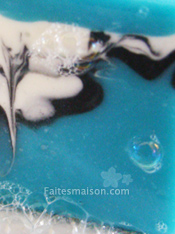
Finally, this exchange was a wonderful opportunity for me to express my respect to a little-known people. So I wanted to honor them, they who seek to preserve their languages ??and traditions, while facing the laws of species protection and environmental. This is where some traditions and environment happiness.
Let us know more precisely to protect our natural large water !
After strength and shine shampoo
25 January 2012 by House made
Filed under After shampoos, Novelty, Hair care
Here to complement the shampoo bar of the same name, un après shampoing tout doux. J’aime beaucoup son résultat car il n’est pas lourd sur le cheveux. Il hydrate bien les pointes et cela sans effet gras. Se rince très bien grâce au tensio actif qu’il contient. Ici aussi j’ai insister pour que la recette reste simple, nul besoin de multiplier les ingrédients pour avoir un produit efficace. Il laisse une douce odeur dans les cheveux… very cool !
Here is the recipe…
| Ingredients | % | Grams |
| Water | 46 % | 46 g |
| BTMS | 10 % | 10 g |
| Huile de Cameline |
6 % | 6 g |
| Huile de coco odorant |
10 % | 10 g |
| Oil Passion Fruit | 7,4 % | 7,4 g |
| Castor oil |
6,6 % | 6,6 g |
| Foam babassu (surfactant) |
1 % | 1 g |
| Silk protein liquid | 2 % | 2 g |
| Lemon essential oil |
1,5 % | 1,5 g |
| Essential oil of lemongrass | 1,5 % | 1,5 g |
| Geogard (conservative) |
0,6 % | 0,6 g |


Difficulty : ![]()
![]()
![]()
![]() ––Conservation : 2 month —–Capacity : +- 100 g
––Conservation : 2 month —–Capacity : +- 100 g
Method :
Combine oils and BTMS in a water bath. In another vessel heat the bath water and foam babassu. When the first mixture is melted and the two phases are equal at a temperature (about 70 ° C) mélanger les ensemble. Fouettez bien jusqu’à refroidissement.
Ajoutez l’extrait de soie, essential oils and ECOGARD. Mix together until the cream is evenly mixed and smooth. Mettez en pot, allow to cool before putting the lid.
Conservez dans un endroit frais et sans humidité. Utilisez cet après shampoing sur les pointes et la longueur des cheveux. N’en mettez pas sur le cuir chevelu, there is no need to moisturize the area is one that relubricated soon.
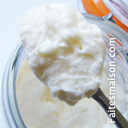
Here I used an electric whisk, c’est ce qui me donne cette texture mousse. Si vous fouettez à la main la texture sera lisse comme une crème normale, cela n’affecte en rien la qualité du produit. Ce n’est que pour l’appréciation de chacun. 🙂
The virtues :
Huile de Cameline : Fed, soothes and protects hair roughed. Fresh green odor.
Oil Passion Fruit : Gives a big boost to the tips damaged.
Castor oil : Acts as a tonic and a good oil for brittle hair, Nail also.
Coconut oil : Smooth hair, provides shine and strength to hair.
Silk protein : Conditions, sheath and relaxed hair weakened.
Lemon essential oil : Gives strength to the hair and brittle nails (brittle).
Essential oil of lemongrass : Adds shine.
My impressions :
Je suis agréablement surprise du résultat. J’avais un peu peur de me retrouver avec les cheveux alourdis, mais il n’en ai rien. Mes cheveux sont doux, facile à coiffée et bien nourrit. Mes boucles se dessine bien aussi et ne sont pas allourdi par la matière. Je pense bien m’en refaire dès que mon pot sera terminé.
Where to find ingredients ?
You will find a page on my site in the cosmetics section called "Suppliers", you will find the addresses of all suppliers that take these ingredients.
How to adapt this recipe ?
Vous pouvez très bien remplacer les huiles ici présente par d’autre qui conviennent plus à vos cheveux. Vous pouvez aussi n’utiliser qu’une seule huile. Même d’autres huiles essentielles, The most important is to respect the proportions indicated.
Anne, a very nice little blogger in fact a few days ago a recipe for hair conditioner in the same spirit but strong it. I put the link here to discover his recipe very nice ! Allez la découvrir ça vaut le détour 😉
Solid strength and shine shampoo
23 January 2012 by House made
Filed under Novelty, Shampoos, Hair care
Here is my first article in 2012… I take this opportunity to wish you a happy new year ! Bien non il est pas trop tard… Today is Chinese New Year ! Et oui am… even when I take a long time to put a new article I make a good timing ^ ^.
Donc aujourd’hui je vous propose une recette pour vous fabriquer un shampoing solide. Qu’est ce que cette matière ? Tout simplement un shampoing en forme de barre de savon on va dire. Mais en mieux, il s’agit ici de plus qu’un savon. Les shampoings typique sont liquide… surfactants used therein, oui c’est ce qu’on appelle les produits qui font mousser vos shampoings. Alors qu’ici on en utilise un qui est solide. Du coup il dure 2 to 3 times longer than a normal shampoo, mousse tout autant et est le parfait allier d’un jetsetter. Ou des gens qui aiment se la rendre moins compliqué !
Ici je vous propose un shampoing pour donner de la force et de la brillance à vos cheveux. La recette est parfaite pour les débutant car facile à réaliser…
| Ingredients | % | Grams |
| Sodium Coco Sulfate (surfactant) | 80 % | 64,2 g |
| Spring Water |
10 % | 8 g |
| Huile de Cameline | 5 % | 4 g |
| Liquid silk proteins | 2 % | 1,6 g |
| Huile essentielle de Citron | 1,4 % | 1,1 g |
| Huile essentielle de Lemongrass | 1,4 % | 1,1 g |
| Vitamin E | 0,2 % | 0,2 g |


Difficulty : ![]()
![]()
![]()
![]() —– Conservation : 3 month —–Capacity : +-80 g
—– Conservation : 3 month —–Capacity : +-80 g
Method :
Spread the scs mortar or blender to break the grains slightly. Soften the water bath for several minutes usc, to a soft paste is formed, rajoutez l’eau. Lorsque l’eau est bien intégré ajoutez votre huile de cameline et mélangez doucement jusqu’à absorption. Hors du feu ajoutez vos protéines de soie et vos huiles essentielles. Vous pouvez ajouter une à deux gouttes de vitamine E pour la bonne conservation de l’huile de cameline. Versez le contenu dans un moule et placez le quelques minutes au réfrigérateur. Lorsque celui ci est bien ferme, démoulez le et laissez sécher dans un endroit sec pendant une journée entière. Le lendemain votre shampoing solide est prêt à être utilisé !
The virtues :
Huile de Cameline : Fed, soothes and protects hair roughed. Fresh green odor.
Silk protein : Conditions, sheath and relaxed hair weakened.
Lemon essential oil : Gives strength to the hair and brittle nails (brittle).
Essential oil of lemongrass : Adds shine.
Where to find ingredients ?
You will find a page on my website in the section called cosmetic “Suppliers”, you will find the addresses of all suppliers that take these ingredients.
My impressions
Cela fait déjà plusieurs semaines que j’utilise quotidiennement mon shampoing. Franchement je l’aime beaucoup. Il n’alourdi pas mes cheveux et les rends doux. Je suis très satisfaite du résultat de l’huile de cameline dans les soins capillaires, il se retrouvera parmi mes favoris c’est certains. Par contre petit conseil… add vitamin E oil to your best to keep.
Christmas Spice Soap
24 December 2011 by House made
Filed under With fragrances, Spicy, Novelty, Soap factory, Soaps
We are the 24 December… and what better way to wish you all and all a Merry Christmas… a small festive recipe ! A mild soaps for the holidays. I made this one a while ago and I must say it smells wonderful. Here is the recipe…
Coco 28 %
Olive 35 %
Raisin 30 %
Brut cocoa 7 %
Surgras to 7%
Water and soda to recalculate
Additions to the trace :
Fragrance Christmas spice 2 %
Oxide green
Red oxide
Titanium dioxide
Star anise (badianes)

Difficulty : ![]()
![]()
![]()
![]() Conservation : Several months
Conservation : Several months
Traditional method of soap cold
Melt the oils together. Add soda water (not the other) and cool. When both mixtures, water and soda, are room temperature, pour the soda / water in your oil and mix until the appearance of the trace. Then add the rest of your ingredients (essential oil, fragrance, oil, oxide, mica) and pour into your mold. Wait 48 h and unmold your soaps with gloves, cut all. Place in a dry place for a minimum cure 4 weeks.
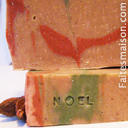
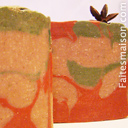
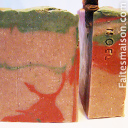
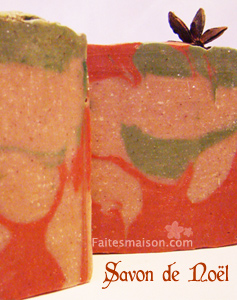 Here I made one a little marbling “free style”, ie no matter how ^ ^. And once again I had a surprise when cutting…. form of a bird sitting on the horns of a reindeer… it is vague in the drawing you say, but it made me smile.
I take this opportunity to wish everyone a very merry Christmas ! I hope you have a wonderful time… please be careful and if you drink… do not take the road !
Soap Citronet !
16 December 2011 by House made
Filed under With fragrances, The fruity, Novelty, Soap factory, Soaps
Everything is in the title… a soap that smells like lemon and clean. Here I used a fragrance as having made soaps with essential oil of lemon in the past… I know that citrus essential oils that do not always hold up well in soap. The fragrance here smells sweet lemon actually. So a little back to childhood for me ^ ^.
How does that I offer recipes for soaps ? Ben oui… the holidays arrive… so I carbureted for a month to make soaps as gifts. Du coup j’en ai beaucoup de recettes à vous montrer 🙂 Voici donc la recette de mon citronet…
Coconut oil 25 %
Beurre de Karité 15 %
Organic Palm Oil 12 %
Olive oil 30 %
Soybean Oil 18 %
Surgras to 7 %
Water and soda to recalculate
The trace :
Lemon fragrance 2 %
Decor :
Ecorse lemon
Neon yellow dye
Bright lime green

Traditional method of soap cold
Melt the oils together. Add soda water (not the other) and cool. When both mixtures, water and soda, are room temperature, pour the soda / water in your oil and mix until the appearance of the trace. Then add the rest of your ingredients (essential oil, fragrance, oil, oxide, mica) and pour into your mold. Wait 48 h and unmold your soaps with gloves, cut all. Place in a dry place for a minimum cure 4 weeks.
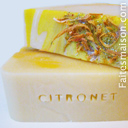
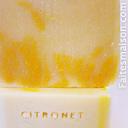
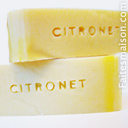
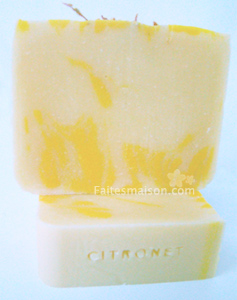 I like the color of this soap… a creamy beige with neon yellow. I applied the same method as my soap scroll, but here my mold was made of wood… I think it changes the rebound effect. It's pretty small by against yellow flames.
![]()
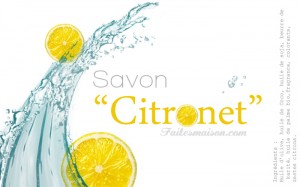
Here is a small label to accompany the soap.
