Catch up some nasty stains on your favorite clothes
5 December 2011 by House made
Filed under Couture, Repair patches, Tips & Tricks
I am sure not to be the only one with rage following a well impregnated stain on one of my favorite clothes ! Taches de vin, oil car, herbs and the worst of the worst… one that no matter what you do not go EVER… the task of bleach !! Ce monstre !!! J’ai comme cet article vous le signale eu un déboire avec madame javel ! Normalement j’en utilise jamais chez moi… but I had to clean up damage there is little that absolutely demanded the use of this product.
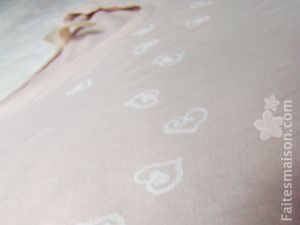
In short I spotted my favorite t-shirt… found a nice top in organic cotton, doux et romantique à souhait. Je me suis dit bon… I put it in full in the bleach… non beurk ! Il serait sorti jaune… So by dint of thinking I found ! Et si je le tamponnais ? Oui oui vous avez bien compris, tamponner. Bien avec de la peinture pour tissus pardi ! Voici ce qu’il vous faudra…
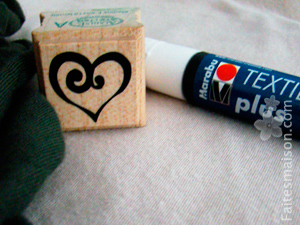
1 felt pen fabric paint (choose depending on the color of your fabrics) between 2 and 3 euro
1 buffer of your choice
the stained
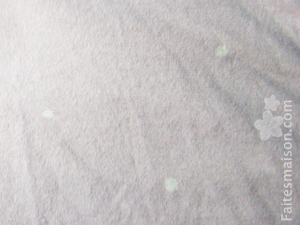
1- Make sure your clothing is clean.
2- Lay your garment on a flat, hard.
3- Schématisez design you want to do on the tissue.
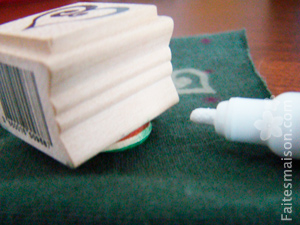
4- Coat the pad with your paint marker.
5- Apply this one on the tissue by pressing well.
6- Let dry and iron about 5 minutes for the paint to stick to the washing.
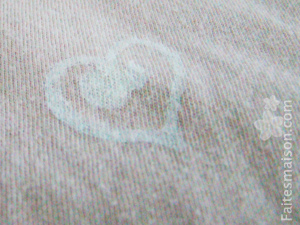
Most of these paintings hold for machine washing, but beware of precise temperature, donc lisez bien les instructions sur votre feutre. Par exemple le mien pourra se laver à 40°C.
You'll find everything you need in any good store of creative leisure !
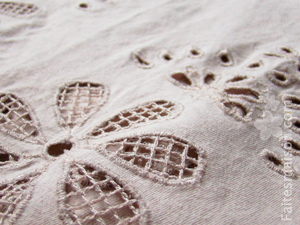
That you kept the wonderful color of your garment and you customized to your taste. 🙂 Franchement j’adore l’ajouré de mon t-shirt ça m’aurait fait mal au coeur de le perdre. Je trouve que les coeurs vont assez bien avec le motif en plus… proof that you can find beautiful solutions ! Most important we do not see those ugly spots !!
My fancy soap… Orange delight !
3 December 2011 by House made
Filed under With essential oils, The fruity, Novelty, Soap factory, Soaps
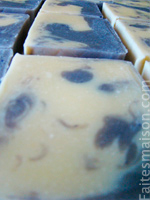
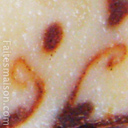
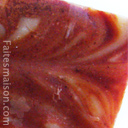
I love how visual experiences in soap. I guess it must be my side “artist” takes over in these moments :D. Still it is after seeing the technique to make nice drops in our soaps with the technique of Ka. I thought… hummm and what it might have happened if I did like this and that… And what was my surprise when the stripping and cutting my soap seen these beautiful curls !!!
Let's start with the recipe for soap…
Hv coconut 30 %
Hv soy 25 %
Olive Hv 25 %
Cocoa butter 19 %
7 % surgras
Water and soda to recalculate
The trace :
2 % He orange, clary sage and lavender
Turmeric

Difficulty : ![]()
![]()
![]()
![]() Conservation : Several months
Conservation : Several months
Traditional method of soap cold
Melt the oils together. Add soda water and cool. When both mixtures, water and soda, are room temperature, pour the soda / water in your oil and mix until the appearance of the trace. Then add the rest of your ingredients (essential oil, oil and mica) and pour into your molds. Wait 48 h and unmold your soaps with gloves. Place in a dry place for a cure 4 weeks.
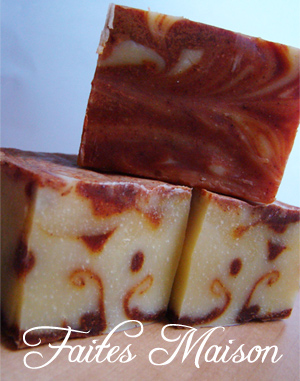 Method that I call “rebound” used for this soap visual
In fact I have done exactly as in the Ka video you can see here… but I did my very slight traces ! This means that my dough was much more fluid than his.
I took a plastic mold from a height of approximately 6 cm I lined with parchment paper. I think the mold material is important for the “rebound” if Fasse. I did this technique in a wooden mold and the effect is not the same but still very nice. I'll show you the result with another of my creation savonnesque.
I separated my dough one remained unchanged and the next I added the turmeric. I poured some of my dough and made clear vertical tracks quickly with my colored paste. With a spatula I applied the rest of my dough and made clear my marbling with the rest of my orange mixture.
Well no it's not that simple ^ ^.
![]()
My impression soap
I like turmeric in soaps… here he gave me a pretty rusty ! The foam is very soft and fine. And the smell… oufff but the smell is to die I love !! I would do this synergy that's for sure ! Here I used the’Orange essential oil from at Soapsession, it is really good in soap, which is not the case for all essential oils citrus.
A big thank you to these magnificent Ka tutorials and videos !! Well yes it is thanks to you I made this soap !! She workshops if you ever environmental learning at the hands of an expert ! You will find everything on soapsession.com
Making a castile soap… it is easy !
22 November 2011 by House made
Filed under With essential oils, The natures, Novelty, Soap factory, Soaps
I think it should be the easiest soap making… and a softer and more ! It only takes a few ingredients because it contains a rate 100% olive oil. This is not a soap says “foaming”, but it is not so serious because now everyone knows… this is not the bubbles that wash ! Mr. soap does not foam but what it is gentle to the skin. This is also a perfect soap for toddlers. The recipe has been passed down for ages and just Castile in Spain… OLÉ ! Here's mine… finally… that I did what ! Here I make a castile soap to surgras 8 %.
Olive Hv 100 %
Water and soda to recalculate
The trace :
0.75 % essential oil of lavender (optional, do not put if it's for your children)
In Deco :
Of bay leaves, of oliviers leaves or other
Green clay
Difficulty : ![]()
![]()
![]()
![]() Conservation : Several months
Conservation : Several months
Traditional method of soap cold :
Reheat gently in olive oil. Add soda water and allow to cool. When both mixtures, water and soda, are room temperature (35 ° C.), pour the soda / water in your oil and mix until the appearance of the trace. Then add the essential oil and pour into your molds.
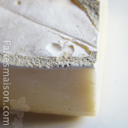
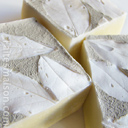
For decoration I simply asked some bay leaves on top of the dough freshly fit the mold and then sprinkled with green clay.
Wait 48 h and unmold your soaps with gloves. Remove leaves gently. Place in a dry place for a cure 4 weeks.
I finally got to use my soap and it is a wonder. It is so sweet, the smell is fresh and not heady. Pure soap and I like the cream color. Anyway, if you hesitate to start in making homemade soap, this recipe is perfect to start.
Savon milk & berries
16 November 2011 by House made
Filed under With fragrances, The fruity, Novelty, Soap factory, Soaps
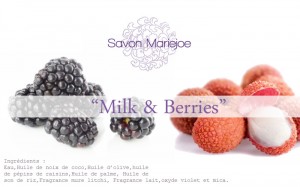
I made this soap there is now 1 month and dust. I wanted to try my new wooden mold made especially for me. I was not disappointed, it is fantastic… a big thank you to my dear uncle ! So this soap… I wanted a little more tasty and fruity smell. So I opted for two fragrances, one of milk and the other of mature & litchi. The latter is a real discovery for me… a complete delight ! I would say lower or you get. Here is the recipe of my beloved soap…
Hv coconut 30 %
Olive Hv 28 %
Hv Grape seed 22 %
Hv palme bio ** 20 %
Water and soda to recalculate
Greasing to 8 %
Additions to the trace :
White part
Brillant Mica * + hv rice bran
Fragrance milk
Violet portion
Oxide violet * + hv rice bran
Fragrance mature & litchi
Difficulty : ![]()
![]()
![]()
![]() Conservation : Several months
Conservation : Several months
Method :
Always the same for soaps. Melt the oils together. Add soda water and allow to cool. When both mixtures, water and soda, are temperature of 40 ° C, pour the soda / water mixture into your oil and mix with a hand blender until the appearance of the trace. Then add the rest of your ingredients (fragrances, oxides and mica) , pour into your molds. Wait 48 h and unmold your soaps with gloves, they cut it if necessary. Place in a dry for a cure 4 weeks.
Marbling :
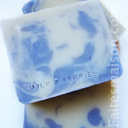
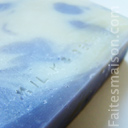
Here I put my purple portion at the bottom of my first mold. I installed long spoon inside the dough, sleeves up. I then cast my whiteware. I pulled one by one spoon forming a gesture “vague”. It gave me a bit strange marbling but I like it anyway. 🙂 J’ai aussi fait une étiquette… I've listed the ingredients… not in Latin but in French which I find easier to understand when the offers as a gift.
*For your dye does not ugly lumps, mix it with a little oil. This will give a soap with a more uniform color.
** I chose this oil as a test because I had never used, However this oil is highly contested because of the deforestation caused by culture. This is a very sensitive issue… I will sell my stock… On verra well.
The famous fragrance Mure Litchi
I find it in Soap Session, a small shop where you can buy everything you need to know your. Karine is a real gem… it also offers courses in soap making, where she shares his tips and some of his secrets !!
Keep your bread !
9 November 2011 by House made
Filed under Tips & Tricks
That has not already rage after buying a bread became very brittle after a day ?!
Little trick I've done for years and is very effective… especially inexpensive ! In a bread box, put half an apple… this will help your bread stay fresh for a few additional days. Also the apple dries… so you will not surprise with mold !

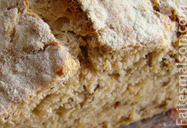
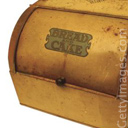
Not bad ? Stay tuned for another tip !
How to maintain your jewelry
9 November 2011 by House made
Filed under Home, Metals, Novelty, Precious stones
Ce n’est pas toujours une chose auquel on pense lorsque l’on s’achète des bijoux. Mais pourtant si vous désirez les conserver longtemps en bon état il y a de petits gestes simple à avoir. Ici je vais vous montrer comment entretenir vos colliers de perles, precious stones and metals.

J’ai du arrêter il y a quelques années mon métier de joaillière pour des raisons de santé. Mais j’en garde beaucoup de mes notions et m’y intéresse toujours autant. Ici je vais partager avec vous quelques notions de bases sans toute fois rentrer dans des détails trop technique. Je partagerais avec vous mes recettes aussi pour entretenir vos bijoux à moindre cout et avec les bon gestes. Cet article sera en deux parties avec ensuite les recettes. J’espère que cet article vous plaira et surtout vous sera utile !
The beads
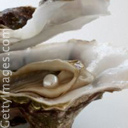
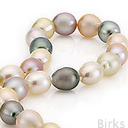
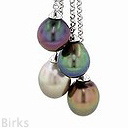
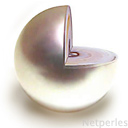
The pearls found everywhere on the continent, are usually cultured pearls, c’est à dire que les mollusques sont fécondé par la main de l’homme. Elles sont créé par des organismes vivants, il faut donc les traiter avec beaucoup de soin. Les tenir loin de l’eau et l’humidité. Ne dormez pas avec vos perles, or take a shower… why ? Tout simplement par ce qu’avec le temps vous enlever une fine couche sur votre perle, the result will be that it will lose its shine, son éclat donc son nacre. Ce serait dommage… especially if these beads have cost you dear.
Here is how to maintain…
Cleaning : With a soft cloth, essuyer vos perles. Jamais d’eau !!
Storage : In a lightly felted, or a small cloth bag, the dark.
Never do :
Wear pearls on a fragrant skin.
Sleeping with beads.
To shower or wash your hair with beads.
Store pearls in light and in a wet environment.
Trick :
How do I know if we have a real black pearl ? Le coeur doit être blanc… if black is that this pearl is treated for stain.
Emeralds
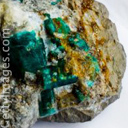
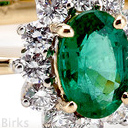
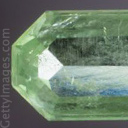
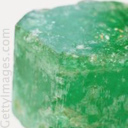
Emerald is found mainly in Colombia, is a stones, sinon la pierre précieuse la plus cher qui existe. Bon bien sur lorsqu’elle est parfaite ! Saviez-vous que ce pierre renferme d’énorme fissure ? Well yes… vous ne les voyez tout simplement pas car elles sont traiter avec une huile spéciale qui va combler toutes ces fissures. Alors nul besoin de vous dire qu’il ne faut jamais se laver les mains avec une bague à émeraude. Si cela arrive vous enlèverais toute l’huile et découvrirez ces grandes fissure blanche. Elle sera tout de suite moins jolie votre bague ! C’est aussi une pierre très fragile, qui au moindre coup peu casser. Donc messieurs… avoid providing a ring or bracelet with emerald to your girlfriend if she is clumsy, loops will be much better case ;).
Here is how to maintain…
Cleaning : a cleaning cloth for metals, n’utilisez jamais de liquide nettoyant pour laver votre bijoux. Il se vend de très bon chiffon à métaux qui feront très bien l’affaire. Il en existe pour l’or et pour l’argent.
Storage : In a jewelery box, away from light and shock can.
Never do :
Wash with a jewelry emerald.
Wearing an emerald if you are clumsy… stay away from shocks.
Opals
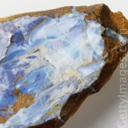
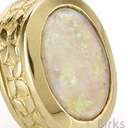
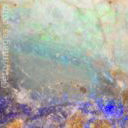
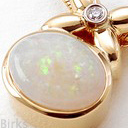
Magnificent stone from Australia… cette pierre se trouve de couleur blanche ou noire. Elle émet de multiples reflets de couleur ! Elle aussi dans sa qualité maximal se trouve être très cher. Elle est aussi plus carieuse qu’on ne le penserais ! Madame n’aime pas la lumière ! Il faut donc s’assurer de la garder dans un endroit au noir.
Here is how to maintain…
Cleaning : a cleaning cloth for metals, n’utilisez jamais de liquide nettoyant pour laver votre bijoux. Il se vend de très bon chiffon à métaux qui feront très bien l’affaire. Il en existe pour l’or et pour l’argent.
Storage : In a jewelery box, away from light and shock can.
Money
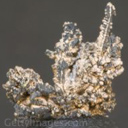
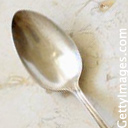
Metal prized by many people… we find in jewelry, in cutlery, matière décorative. Mais savez vous vraiment l’entretenir. En effet l’argent ne peu être porté pur… car trop mou. C’est un alliage fait avec du cuivre. Il s’oxyde facilement d’où sa teinte qui a tendance à noircir. Pourtant il y a des geste simple pour le garder clair et brillant. Mais comment peut il s’oxyder ? L’humidité y est pour quelque chose, and the acidity produced in the skin.
Here is how to maintain…
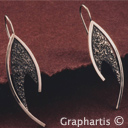
Cleaning : Il existe des pâtes nettoyante parfaite pour enlever la matière oxydé. Mais aussi des chiffons… qui sont souvent plus pratique lorsque votre bijoux à une magnifique pierre. Ne les baigner pas dans des solutions nettoyante… souvent trop acide elle enlève carrément de la matière. ce qui peut être embêtant lorsqu’on a de la coutellerie “plated” to money… because often the basis of cutlery is made of copper or brass… vos ustensiles deviendront donc rouge ou doré. Il faut nettoyer en douceur… car parfois un joaillier ou un orphèvre aura justement joué des ombres et lumière avec ce précieux métal. En effet les ciselures, textures, drawings stand out very well with the background of those they oxidized… such as earrings that I made long ago in my former profession of jeweler, photo ci haut. Si vous nettoyer tout… these effects disappear.
Storage : Muffled in rags… un peu semblable à ceux des rangements pour perles. Garder votre coutellerie à l’abri et vos bijoux dans une boite à bijoux feutré.
Never do :
N’utilisez pas des bains d’acide pour nettoyer vos bijoux et argenterie. Cela risque de les abîmer avec le temps.
Tomorrow I will speak of gold, amber, sapphires and more… with homemade recipes to clean your jewelry safe course !
Oatmeal Cookies, chocolate and dried fruit
4 November 2011 by House made
Filed under Cookies, Cuisine, Novelty
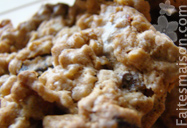
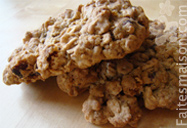
As a child I love oats… les bols du matin et le croquant qu’il apporte dans les cookies. J’aime que les cookies bien croquant et moelleux à la fois ! J’ai essayé plusieurs recette avant d’adopter celle ci depuis des années… and I'm never disappointed ! Je m’excuse d’avance pour les mesures en ml et non en gramme mais il s’agit à la base d’une recette en “tax” Nord Américaine. Je la fait toujours avec un verre mesureur et ça fonctionne très bien ! I convertirais gram in one day … If I have the time :). Here is the recipe…
310 ml of the blonde Vergeoise
250 ml butter
125 ml sugar
2 eggs
2 tablespoons milk
430 ml of the farine
1/2 cc de sel
1 teaspoon baking soda (not replace yeast)*
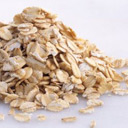
625 Oat ml
350 ml of a mixture of :
Toasted almonds
Dried cranberries or raisins
Chocolate chips
Optional additions : aromatic bourbon vanilla extract
Method :
1- In large bowl combine butter, sugar, the brown sugar, les œufs et le lait. Si vous désirez ajouter un extrait aromatique ajoutez le à cette étape.
2- In another bowl mix your dry ingredients, the flour, le bicarbonate de soude et le sel. Lorsque les ingrédients secs sont bien mélangé ajoutez les à la première préparation.
3- Now you'll need good arm… il vous faut ajouter votre avoine et ensuite votre mélange de fruits secs et chocolat. Votre pâte sera très ferme… thus concentrate on your arm robot !
4- You just have to make small ball with a spoon, careful not too big nor too close to each other because the dough is going to crash during cooking.
5- Bake at 180 ° C for about 10 to 15 minutes, until they are golden brown.
Out of the oven, let cool on a plate and taste ! A true delight… je vous garantis qu’ils partiront en un clin d’œil !
* Baking brings crisp recipe… if you change from yeast to your cookie will not at all crunchy.
Soap tribute to Weeds…
7 October 2011 by House made
Filed under With fragrances, With essential oils, Novelty, Soap factory, Soaps
There was a few months Kafee home Soapsession we threw a challenge “Americain soap“, make a soap under the theme of our favorite TV series. I must say that I had a hard time choosing because there are many that I like. But a special inspiration came to me with the series Weeds. If you've never watched I advise you… it's a little inspiration in British film “Saving Grace“, if you've never seen so… well go ahead it's a good slice of laughter !
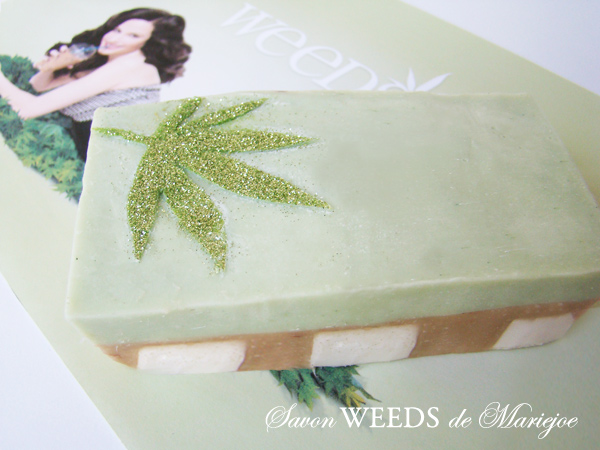
Here is… then the heroine of the series traffics cannabis to feed his family following the death of her husband. Although it is not a consumer keen she is his drug iced coffees… she even downright drunk all the time. My soap is so inspired by these two things… Cannabis and iced coffee. I have a background of soap smells of coffee and patchouli, with ice melt in&for to finish with a green top layer made of hemp oil and smell of freshly cut grass. Here is the recipe…
Basic coffee
Coconut oil 30 %
Rapeseed oil 35 %
Cocoa butter 35 %
Water & soda to recalculate
Additions
Mica noisette
He patchouli
He petitgrain
Ice cubes
Melt & for goat milk
Coffee butter
Fragrance Coffee
Mica brillant
Base chanvre
Coconut oil 37 %
Hemp oil 16 %
Beurre de karité 26 %
Huile d'olive virgin 21 %
Water & soda to recalculate
Additions
Oxide green
Fragrance Green grass

Difficulty : ![]()
![]()
![]()
![]() Conservation : Several months
Conservation : Several months
Traditional method of soap cold
Melt the oils together. Add soda water and cool. When both mixtures, water and soda, are room temperature, pour the soda / water in your oil and mix until the appearance of the trace. Then add the rest of your ingredients (essential oil, oil and mica) and pour into your molds. Wait 48 h and unmold your soaps with gloves. Place in a dry place for a cure 4 weeks.
My steps
I cast my first dough “Basic coffee”, add my ice already pre-made and pre-cut. The next day I made my second dough, that hemp and poured it all over.
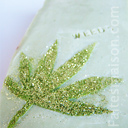
The design of the hemp leaf
It's very simple, in a thick plastic sheet bought in a DIY store, I drew my paper and cut it to the cuter. Then I've used as a stencil to cut my soaps (48 h after resting)… with pretty green glitter. Sympa non ?
Here rendering larger !
Minute care against wrinkles
5 October 2011 by House made
Filed under Cosmetic, Novelty, Serum, Eye Care
I have worries of wrinkles… I've looked everywhere and niet, nothing that satisfied me in terms of efficiency… ni mon compte de banque d’ailleurs. En mai dernier, je devais partir à l’étranger et bien sur je cherche toujours de petits flacons à emporter. Le gros tube de crème prenait trop de place, je me suis donc fait ce petit roll on et ma foi j’en suis bluffé. En plus il m’a pris exactement deux minutes à réaliser. Je l’applique surtout le soir pour un petit boost !
2 ml hv canneberges (omega 3, 6 and vitamin E)
1.5 hv ml rose musqué
1.5 hv are riz ml
1 drops of vitamin E
Difficulty : ![]()
![]()
![]()
![]() ––Conservation : 6 month —–Capacity : 5 ml
––Conservation : 6 month —–Capacity : 5 ml
Method
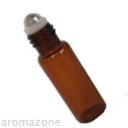
Mélangez toutes vos huiles et la vitamine E. Versez dans un flacon roll coloré pour conserver à l’abri de la lumière votre mélange et puis c’est tout !
Use
Passez votre roll on sur le contour de l’œil avec délicatesse. Avec votre doigt massez doucement la région et encore une fois c’est tout.
Verdict
Franchement c’est bien la preuve qu’il est inutile dans la vie de compliquer les choses. Un très bon soin, petit prix et surtout bien efficace. Vous pouvez aussi changer les huiles et rajouter des actifs. C’est bien non ?
The –
We have to wait a bit before applying makeup with an oil, if you press the very morning, keep it carefully for the evening before bedtime.
The +
The m'a costed to do exactly 2.20 euro with the bottle which is 1.50 euro. Donc si vous garder votre flacon, your mix will cost you 0.72 euro à chaque fois. Hé ben oui… this is the real deal for this price and a good care !
On the net
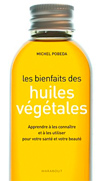 Environment to learn more about vegetable oils ? Michel Pobeda fondateur et directeur de Codina, just released a book on the subject “The benefits of vegetable oils“. C’est un des livres sur ma liste de chouchou à acheter !
Give new life to your clothing !
30 September 2011 by House made
Filed under Couture, Novelty, Natural dye, Tips & Tricks
Aujourd’hui je vous présente une astuce pour redonner une deuxième vie à vos vêtements. On a tous un pull, a shirt, un débardeur ou autre vêtement dans nos tiroirs qu’on adore mais qui malheureusement ont déteint. Ils sont rendu moche… et pourtant on AAAADORE les porter. Comme j’aime pas jeter pour rien… oui car jeter un débardeur délavé je trouve ça du gachi voir carrément inutile. Alors voici ma réponse… tea !
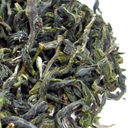
How does what the tea ? Bien oui ça colore le thé… and more on white black tea that gives a very nice color ! Ici je n’ai testé que le thé noir… le plus pigmenté. Cela dit on peut faire des teintures naturel avec beaucoup d’ingrédients, the onion peels, the bétrave, indigo in powder, the henna, the flowers, etc..
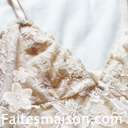

Returning to the library, yes again, j’ai trouvé un livre fabuleux sur la teinture naturel sur tissus. Malheureusement je ne me souviens plus du nom de ce livre, but you will easily find here. J’ai trouvé la démarche très intéressante d’autant plus que je fais de la couture. Acheter un tissus blanc tout simple et y faire son propre design m’intrigue beaucoup.
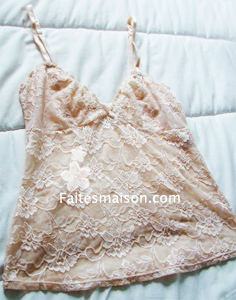 So I did a try on a white tank top that I had, I love the result, ça lui donne un petit coté vintage. Je l’ai tout simplement mis dans une bassine d’eau très chaude dans lequel j’avais infusé du thé. After 3 hours I rinsed with cold water and voila !
Après un peu plus de recherches je suis tombé sur an article in BurdaStyle sur le Eco dying (dyeing ecological). Quelques couturière avait justement fait des tests similaires sur des morceaux de tissus. One technique was to put some flowers / plants / fruits on fabric, replier la seconde partie sur le dessus et l’écraser. On peut ainsi faire de magnifiques impression et au naturel svp ! Je n’ai pas encore fait ces techniques mais ce n’est qu’une question de temps !
If you are interested in natural dyes you can find on the following site le résultat en couleur de toutes sortes de matières premières. Bien oui car ce n’est pas par ce qu’une plante est d’une couleur qu’au final on obtient celle là sur le tissus.
Et si vous souhaitez poussez la difficulté encore plus loin voici la technique pour faire de magnifique dessin sur vos tissus lors de la teinture. On appelle ça la technique Shibori and even if you do not understand English images even talk about them !
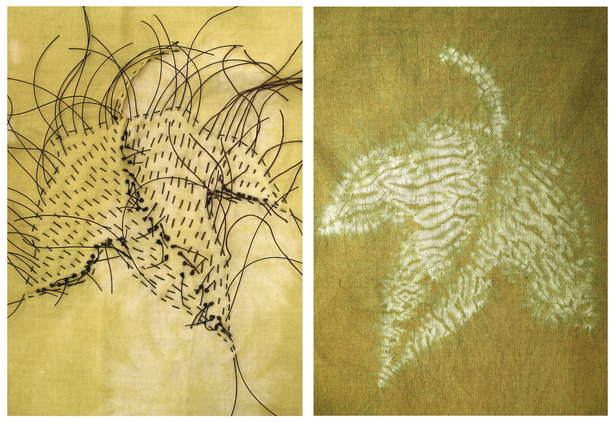 Image Burdastyle.com
That's it you just have to get started ! 🙂
